WordPress Basics
This guide is a small course in managing your website based on WordPress. This software is built very intuitive and can be learned in a short time. Since WordPress is being updated regularly, our images might not always show the latest details.
The Dashboard
- You always log in via http://”mysite.com”/wp-admin/ with your username and password.
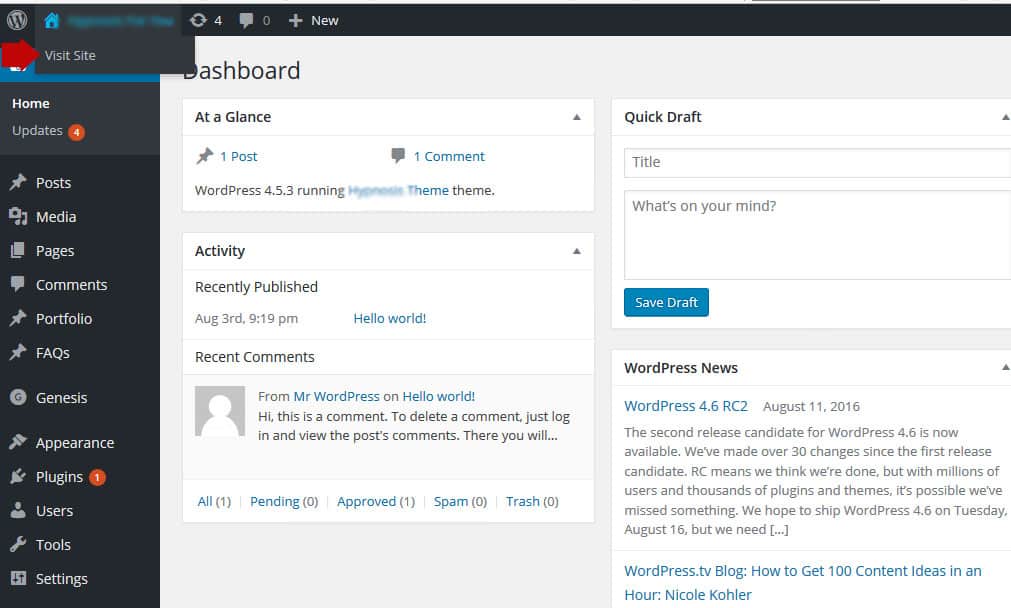
- When you log in into your WordPress site, you will see the dashboard first — it is your control center.
- Depending on the rights that you have been granted you will see a few or many menu points on the left.
- Your email address is on file. If you lose your password, you are are able to retrieve it in a two step process.
Visiting the front end of your site
- You see your site by running your mouse over the site name. A drop down shows the link to the front end your site.
- Whenever you are logged in to your site and visit the front end, you will see a grey bar on the top of your screen with basic short cuts like “Edit Page”.
Basic Structure: Pages and Posts
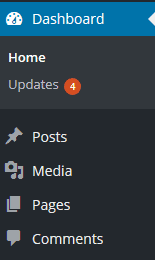
WordPress has Posts and Pages – see it in the snapshot below.
Pages
…relate to normal website pages – they do not have a date assigned to them, you do not change them very often. They make the basic structure of your website.
Posts
…are part of a blog or online journal. These articles are time sensitive, normally marked with the date of publishing and a note about the author. Posts are being listed with the newest publication first.
Posts are commonly listed in categories and marked with keywords that are called tags.
It used to be typical for a blog that readers can comment on the article and enter into a discussion. This feature is disabled by default.
In most sites the Main menu is displaying pages and sub pages, where as posts, recent posts and their categories are being listed in a sidebar.
Clicking on pages will show you a list of pages and clicking on ‘add new’ will add a new page. Same for the posts. It is really simple.
Creating and editing – most important to remember:
Do not copy and paste directly from emails or websites, even WORD
There is an app for that…
Even if it does not look like – WORD, email programs and websites have tons of coding hidden in any document. Pasting text directly into WordPress might create unnecessary trouble later.
Clicki the “T” icon and paste the text. Much of the WORD typical code will be filtered out.

Formatting: Only use Essentials
Basic font settings are separately defined in the HTML code, so there is no need to tweak font size and colors.
It is best to get used to the proper formatting from the very beginning, if you have used Word properly before, it really pays off.
Basic formatting styles:
Heading 1 through 6
Heading 1
Heading 2
Heading 3
Important: Heading 1 is already used as the page title, so never start with Heading 1, always with a paragraph or Heading 2
Paragraph (hit Enter)
Line Break (hit Shift + Enter)
Lists (unordered with bullet points, ordered with numbers)
- list item one
- list item two
Bold
Italics
Underlined
All of those are included in the basic editor. Stick to those in order to keep the style of pages and posts consistent over the entire website.
Important: Paragraph vs. Line Break
- When you start writing within the text, WordPress will format it as a paragraph.
- If you hit enter, it will create another paragraph.
- To create a line break, hit shift — enter.
- Short paragraphs can be easily converted into a headline. For that just highlight the text and switch from paragraph to a headline, most likely Heading 2 or Heading 3.
Headings 1
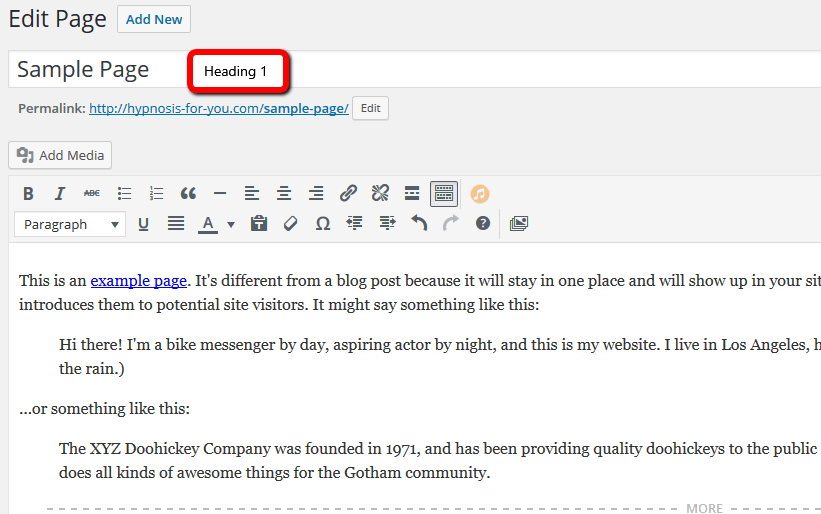
…are usually used for titles of pages and posts. Since in our example “Gallery” is the title of the page, it will later appear as a Heading 1.
Again: do not use another Heading 1 within the text.
Inserting Images
Both pages and posts share the same editor, which looks like an older version of Word or WordPad.
To insert an image, click on the left small picture frame icon next to the upload/insert link.
A window will open giving you the choice where to pull the image from:
Your computer, a link from the internet, or your Media Library.
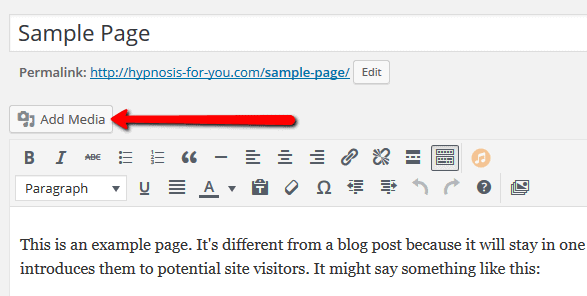
Image alignment
In the HTML web programming language, images can be aligned in four ways:
- no alignment [since we start writing from the left side, it will be left aligned]
- left aligned — this will wrap the text around the image on the right
- right aligned — this club wrap the text around the image on the left
- center aligned — nope wrapping of text around the image
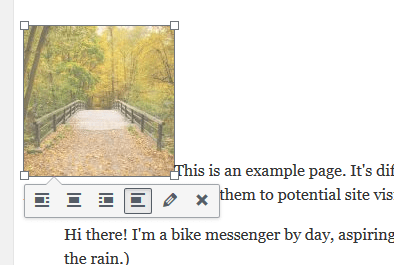
Once you have inserted the image into the text, you will be able to edit or delete it it by clicking on it once — related icons will show.
In the edit dialog you will be even able to resize it.
Inserting a Link
The link icons are only active either when we select a text that should be linked, or when we select a text that is already linked.
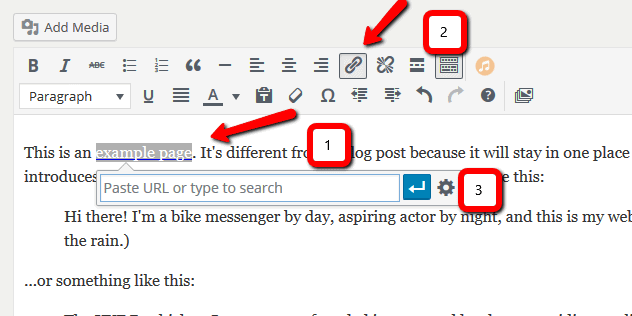
Once we select a text, the link icons become active.
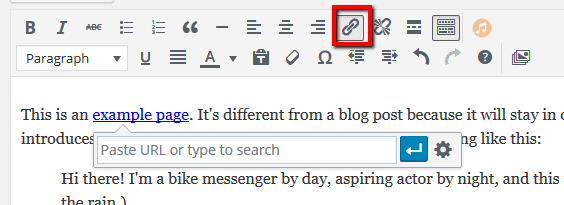
By clicking on the wrench icon we can select whether we choose an outbound link to another website (check mark “open link in a new window”),
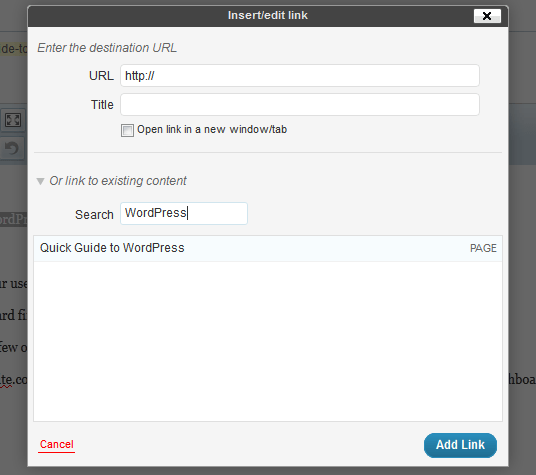
or a link on our website. To avoid browsing through the list of pall pages and posts, we can use the search function.
Easiest is to search for the page/post title or parts of it, in our sample Quick Guide or WordPress are best.
Highlight the correct page, click Add Link, and you are done!
Inserting Read More into a Blog page
A blog page typically displays your (latest) posts, showing the newest first. This page can be created for one or all categories.
If you only want to show the introductory paragraph(s) rather than the full post, you can insert a ‘read more’ link to the full post:
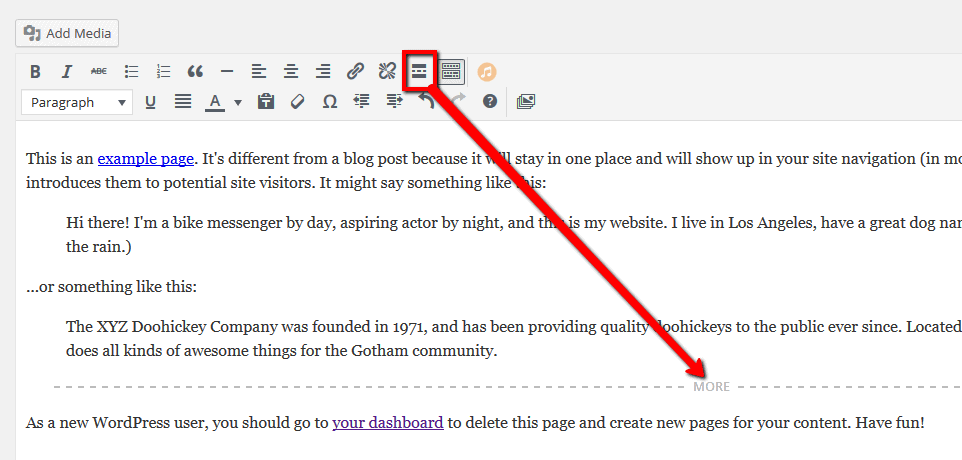
Just make a paragraph break, place the cursor into the empty line, and hit the Read More icon.
A horizontal line will occur.
Learning WordPress – Tutorials
There are many video tutorials on the internet, e.g. on YouTube, such as this one: http://www.youtube.com/watch?v=HdMsZq4GS8Q&feature=related
